(→Episodes: adding episode table... will finish later, gotta go) |
No edit summary |
||
| (23 intermediate revisions by 3 users not shown) | |||
| Line 1: | Line 1: | ||
{{Season |
{{Season |
||
|name= Season One |
|name= Season One |
||
| − | |image= [[File:Top Shot S1.jpg| |
+ | |image= [[File:Top Shot S1.jpg|300px]] |
|host= [[Colby Donaldson]] |
|host= [[Colby Donaldson]] |
||
| − | |country= {{flag|United States}} |
+ | |country= {{flag|United States}} United States |
| − | |languages= |
+ | |languages= English |
|contestants= 16 |
|contestants= 16 |
||
|teams= *[[Blue Team (Season One)|Blue Team]] |
|teams= *[[Blue Team (Season One)|Blue Team]] |
||
| Line 13: | Line 13: | ||
|channel= [[History Channel]] |
|channel= [[History Channel]] |
||
|episodes= 10 |
|episodes= 10 |
||
| − | |run= |
+ | |run= June 6–August 15, 2010 |
|status= Concluded |
|status= Concluded |
||
}} |
}} |
||
| − | '''Season One''' of ''[[Top Shot]]'' premiered on |
+ | '''Season One''' of ''[[Top Shot]]'' premiered on June 6, 2010, and concluded on August 15, 2010. The season contained ten episodes, which aired on Sunday nights. The winner of the season was British marksman [[Iain Harrison]], who was originally from the [[Blue Team (Season One)|Blue Team]]. |
| + | |||
| + | ''[[Top Shot: The Complete Season One]]'' was released on [[DVD]] in the U.S. on January 11, 2011. |
||
==Production== |
==Production== |
||
| Line 23: | Line 25: | ||
The first season of ''Top Shot'' was filmed over the course of 33 days from March to April of 2010, in [[Santa Clarita, California]]. The season premiered on June 6, and concluded on August 15, 2010. |
The first season of ''Top Shot'' was filmed over the course of 33 days from March to April of 2010, in [[Santa Clarita, California]]. The season premiered on June 6, and concluded on August 15, 2010. |
||
| + | |||
| + | The entire season was released on DVD on January 11, 2011. |
||
==Rules== |
==Rules== |
||
| − | During their time living in the house, contestants were not allowed to have cell phones, e-mail, newspapers, books, TV or music. Also, they weren't allowed to leave the house grounds. |
+ | During their time living in the house, contestants were not allowed to have cell phones, e-mail, newspapers, books, TV or music. Also, they weren't allowed to leave the house grounds, except for the challenges. |
Every third day, teams would have a practice to prepare them for a [[Team Challenge]]. The team that loses the Team Challenge has to go to the [[Nomination Range]] the next morning. There, the losing team has to nominate two contestants to face off in an [[Elimination Challenge]]. After a practice for that challenge, the nominated contestants compete. The loser of the Elimination Challenge must leave the competition. |
Every third day, teams would have a practice to prepare them for a [[Team Challenge]]. The team that loses the Team Challenge has to go to the [[Nomination Range]] the next morning. There, the losing team has to nominate two contestants to face off in an [[Elimination Challenge]]. After a practice for that challenge, the nominated contestants compete. The loser of the Elimination Challenge must leave the competition. |
||
| Line 130: | Line 134: | ||
==Episodes== |
==Episodes== |
||
| + | |||
<!-- |
<!-- |
||
| + | {| class="wikitable" |
||
| + | |-bgcolor=#6E6E6E |
||
| + | | <center>'''Image'''</center> |
||
| + | | colspan="2"| <center>'''Title'''</center> |
||
| + | | <center>'''Number'''</center> |
||
| + | | <center>'''Original Airdate'''</center> |
||
| + | |- |
||
| + | |rowspan="3" class="image" style="width:140px;"| [[File:The Long Shot.jpg|110px]] || colspan="2" | [[The Long Shot]] || 1 || June 6, 2010 |
||
| + | |- |
||
| + | | colspan="4" class="description"| Weapons used: |
||
| + | * [[M1903 Springfield]] |
||
| + | * [[SVT-40]] |
||
| + | * [[Mosin-Nagant]] |
||
| + | * [[M14 rifle]] |
||
| + | * [[Remington 700|Scoped Remington 700]] |
||
| + | |- |
||
| + | | Expert: || [[Craig Sawyer]] || Eliminated: || bgcolor="red"| <small>[[Mike Seeklander|<font color="white">Mike Seeklander</font>]]</small> |
||
| + | |- |
||
| + | |} |
||
| + | --> |
||
| + | |||
{| class="wikitable" |
{| class="wikitable" |
||
|- |
|- |
||
| Line 143: | Line 169: | ||
| 1 |
| 1 |
||
| [[The Long Shot]] |
| [[The Long Shot]] |
||
| − | | [[M1903 |
+ | | [[M1903 Springfield]]<br/>[[SVT-40]]<br/>[[Mosin-Nagant]]<br/>[[M14 rifle]]<br/>[[Remington 700|Scoped Remington 700]] |
| − | | [[Craig Sawyer]] |
+ | | <small>[[Craig Sawyer]]</small> |
| − | | bgcolor="red"| [[Mike Seeklander|<font color="white">Mike Seeklander</font>]] |
+ | | bgcolor="red"| <small>[[Mike Seeklander|<font color="white">Mike Seeklander</font>]]</small> |
|- |
|- |
||
| − | | [[File: |
+ | | [[File:Frank Campana EC.jpg|110px]] |
| 2 |
| 2 |
||
| [[Zipline of Fire]] |
| [[Zipline of Fire]] |
||
| [[Beretta 92F]] |
| [[Beretta 92F]] |
||
| − | | [[Ben Stoeger]] |
+ | | <small>[[Ben Stoeger]]<br/>[[Matt Burkett]]</small> |
| − | | bgcolor="red"| [[Frank Campana|<font color="white">Frank Campana</font>]] |
+ | | bgcolor="red"| <small>[[Frank Campana|<font color="white">Frank Campana</font>]]</small> |
|- |
|- |
||
| [[File:Archer Enemies.jpg|110px]] |
| [[File:Archer Enemies.jpg|110px]] |
||
| 3 |
| 3 |
||
| [[Archer Enemies]] |
| [[Archer Enemies]] |
||
| − | | [[English longbow]] |
+ | | [[English longbow]]<br/>[[Crossbow|Scoped crossbow]] |
| − | | [[Chris Palmer]] |
+ | | <small>[[Chris Palmer]]<br/>[[Bill Troubridge]]</small> |
| − | | bgcolor="red"| [[Bill Carns|<font color="white">Bill Carns</font>]] |
+ | | bgcolor="red"| <small>[[Bill Carns|<font color="white">Bill Carns</font>]]</small> |
|- |
|- |
||
| [[File:Friend or Foe.jpg|110px]] |
| [[File:Friend or Foe.jpg|110px]] |
||
| 4 |
| 4 |
||
| [[Friend or Foe?]] |
| [[Friend or Foe?]] |
||
| − | | [[AR-15]] |
+ | | [[AR-15]]<br/>[[TZ99]] |
| − | | [[Craig Sawyer]] |
+ | | <small>[[Craig Sawyer]]</small> |
| − | | bgcolor="blue"| [[James "Jim" Sinclair|<font color="white">Jim Sinclair</font>]] |
+ | | bgcolor="blue"| <small>[[James "Jim" Sinclair|<font color="white">Jim Sinclair</font>]]</small> |
|- |
|- |
||
| − | | [[File:The Good, |
+ | | [[File:The Good, The Rat and The Ugly.jpg|110px]] |
| 5 |
| 5 |
||
| [[The Good, the Rat and the Ugly]] |
| [[The Good, the Rat and the Ugly]] |
||
| − | | [[Kentucky rifle]] |
+ | | [[Kentucky long rifle]]<br/>[[Winchester Model 1873]] |
| − | | [[Garry James]] |
+ | | <small>[[Garry James]]</small> |
| − | | bgcolor="blue"| [[Caleb Giddings|<font color="white">Caleb Giddings</font>]] |
+ | | bgcolor="blue"| <small>[[Caleb Giddings|<font color="white">Caleb Giddings</font>]]</small> |
|- |
|- |
||
| [[File:Wild, Wild West.jpg|110px]] |
| [[File:Wild, Wild West.jpg|110px]] |
||
| Line 179: | Line 205: | ||
| [[Wild, Wild West]] |
| [[Wild, Wild West]] |
||
| [[Colt Peacemaker]] |
| [[Colt Peacemaker]] |
||
| − | | [[Spencer Hoglund]] |
+ | | <small>[[Spencer Hoglund]]</small> |
| − | | bgcolor="red"| [[Andre Robinson|<font color="white">Andre Robinson</font>]] |
+ | | bgcolor="red"| <small>[[Andre Robinson|<font color="white">Andre Robinson</font>]]</small> |
|- |
|- |
||
| [[File:Trick Shot Showdown.jpg|110px]] |
| [[File:Trick Shot Showdown.jpg|110px]] |
||
| 7 |
| 7 |
||
| [[Trick Shot Showdown]] |
| [[Trick Shot Showdown]] |
||
| − | | [[Winchester Model 1873]] |
+ | | [[Winchester Model 1873]]<br/>[[Smith & Wesson M&P revolver]]<br/>[[Schofield revolver]]<br/>[[Beretta Xtrema2]] |
| + | | <small>[[Jon "Trick Shot" Wilson]]<br/>[[Scott Robertson]]</small> |
||
| − | | [[Spencer Hoglund]] |
||
| − | | bgcolor="red"| [[ |
+ | | bgcolor="red"| <small>[[Brad Engmann|<font color="white">Brad Engmann</font>]]</small> |
|- |
|- |
||
| − | | [[File:The Razor's Edge.jpg|110px]] |
+ | | rowspan="2"| [[File:The Razor's Edge.jpg|110px]] |
| + | | rowspan="2"| 8 |
||
| − | | 8 |
||
| − | | [[The Razor's Edge]] |
+ | | rowspan="2"| [[The Razor's Edge]] |
| + | | rowspan="2"| [[Throwing knife]]<br/>[[Slingshot|Modern slingshot]] |
||
| − | | [[Ruger 10/22]] (team)<br/>[[Smith & Wesson .22 Model 317]] (elimination) |
||
| + | | rowspan="2"| <small>[[Todd Abrams]]<br>[[Jon Huffer|John "Chief" Huffer]]</small> |
||
| − | | [[Spencer Hoglund]] |
||
| − | | bgcolor="blue"| [[ |
+ | | bgcolor="blue"| <small>[[Tara Poremba|<font color="white">Tara Poremba</font>]]</small> |
|- |
|- |
||
| + | | bgcolor="red"| <small>[[Denny Chapman|<font color="white">Denny Chapman</font>]]</small> |
||
| − | | [[File:The Shortest Fuse.jpg|110px]] |
||
| − | | 9 |
||
| − | | [[The Shortest Fuse]] |
||
| − | | [[Barrett 82A1 .50]] (individual)<br/>[[M1 Garand]] (elimination) |
||
| − | | [[Ryan Cleckner]] |
||
| − | | bgcolor="green"| [[Jay Lim|<font color="white">Jay Lim</font>]] |
||
|- |
|- |
||
| − | | rowspan=" |
+ | | rowspan="3"| [[File:Kelly Bachand 1st IC p2.jpg|110px]] |
| + | | rowspan="3"| 9 |
||
| + | | rowspan="3"| [[The Shortest Fuse]] |
||
| + | | rowspan="3"| [[Beretta 92F]]<br/>[[TZ99]]<br/>[[Heckler & Koch HK93]]<br/>[[Mosin-Nagant 91/30|Mosin-Nagant]]<br/>[[SVT-40]] |
||
| + | | rowspan="3"| <small>[[Craig Sawyer]]</small> |
||
| + | | bgcolor="green"| <small>[[Blake Miguez|<font color="white">Blake Miguez</font>]]</small> |
||
| + | |- |
||
| + | | bgcolor="green"| <small>[[Adam Benson|<font color="white">Adam Benson</font>]]</small> |
||
| + | |- |
||
| + | | bgcolor="green"| <small>[[Kelly Bachand|<font color="white">Kelly Bachand</font>]]</small> |
||
| + | |- |
||
| + | | rowspan="5" | [[File:S1 Finale.jpg|110px]] |
||
| rowspan="5" | 10 |
| rowspan="5" | 10 |
||
| rowspan="5" | [[Season Finale]] |
| rowspan="5" | [[Season Finale]] |
||
| − | | rowspan="5" | [[ |
+ | | rowspan="5" | [[Beretta 92F]]<br/>[[Mosin-Nagant 91/30]]<br/>[[SVT-40]]<br/>[[Heckler & Koch HK93]]<br/>[[TZ99]]<br/>[[Schofield Revolver]]<br/>Smith & Wesson M&P Revolver<br/>[[Throwing knife]]<br/>[[English longbow]]<br/>[[Colt Peacemaker]]<br/>[[Winchester Model 1873]]<br/>[[AR-15]]<br/>[[M14 rifle]] |
| rowspan="5" | none |
| rowspan="5" | none |
||
| − | | bgcolor="green"| [[ |
+ | | bgcolor="green"| <small>[[Peter Palma|<font color="white">Peter Palma</font>]]</small> |
|- |
|- |
||
| − | | bgcolor="green"| [[J.J. Racaza|<font color="white">J.J. Racaza</font>]] |
+ | | bgcolor="green"| <small>[[J.J. Racaza|<font color="white">J.J. Racaza</font>]]</small> |
|- |
|- |
||
| − | | bgcolor="green"| [[Chris Cerino|<font color="white">Chris Cerino</font>]] |
+ | | bgcolor="green"| <small>[[Chris Cerino|<font color="white">Chris Cerino</font>]]</small> |
|- |
|- |
||
| <center>'''Winner'''</center> |
| <center>'''Winner'''</center> |
||
|- |
|- |
||
| − | | bgcolor="green"| [[Iain Harrison|<font color="white">Iain Harrison</font>]] |
+ | | bgcolor="green"| <small>[[Iain Harrison|<font color="white">Iain Harrison</font>]]</small> |
|- |
|- |
||
|} |
|} |
||
| − | --> |
||
==Elimination== |
==Elimination== |
||
| + | {|class="wikitable" style="text-align:center" |
||
| + | |- |
||
| + | !rowspan=2|# |
||
| + | !rowspan=2|Contestants |
||
| + | !colspan=14|Episodes |
||
| + | |- |
||
| + | !1!!2!!3!!4!!5!!6!!7!!8!!colspan="2"|9!!colspan="3"|10 |
||
| + | |- |
||
| + | !1 |
||
| + | |bgcolor="green"|<font color="black">''Iain''</font> |
||
| + | |bgcolor="cornflowerblue"| WIN |
||
| + | |bgcolor="cornflowerblue"| WIN |
||
| + | |bgcolor="cornflowerblue"| WIN |
||
| + | |bgcolor="pink"| NOM |
||
| + | |bgcolor="white"| SAFE |
||
| + | |bgcolor="cornflowerblue"| WIN |
||
| + | |bgcolor="cornflowerblue"| WIN |
||
| + | |bgcolor="cornflowerblue"| WIN |
||
| + | |bgcolor="white"| SAFE |
||
| + | |bgcolor="white"| SAFE |
||
| + | |bgcolor="purple"| <font color="white">WIN</font> |
||
| + | |bgcolor="purple"| <font color="white">WIN</font> |
||
| + | |bgcolor="limegreen"| WINNER |
||
| + | |- |
||
| + | !2 |
||
| + | |bgcolor="green"|<font color="black">''Chris''</font> |
||
| + | |bgcolor="cornflowerblue"| WIN |
||
| + | |bgcolor="cornflowerblue"| WIN |
||
| + | |bgcolor="cornflowerblue"| WIN |
||
| + | |bgcolor="white"| SAFE |
||
| + | |bgcolor="white"| SAFE |
||
| + | |bgcolor="cornflowerblue"| WIN |
||
| + | |bgcolor="cornflowerblue"| WIN |
||
| + | |bgcolor="cornflowerblue"| WIN |
||
| + | |bgcolor="white"| SAFE |
||
| + | |bgcolor="white"| SAFE |
||
| + | |bgcolor="pink"| BTM2 |
||
| + | |bgcolor="white" | SAFE |
||
| + | |bgcolor="tomato"| OUT |
||
| + | |- |
||
| + | !3 |
||
| + | |bgcolor="green"|<font color="black">''J.J.''</font> |
||
| + | |bgcolor="cornflowerblue"| WIN |
||
| + | |bgcolor="cornflowerblue"| WIN |
||
| + | |bgcolor="cornflowerblue"| WIN |
||
| + | |bgcolor="white"| SAFE |
||
| + | |bgcolor="white"| SAFE |
||
| + | |bgcolor="cornflowerblue"| WIN |
||
| + | |bgcolor="cornflowerblue"| WIN |
||
| + | |bgcolor="cornflowerblue"| WIN |
||
| + | |bgcolor="white"| SAFE |
||
| + | |bgcolor="purple"| <font color="white">WIN</font> |
||
| + | |bgcolor="purple"| <font color="white">WIN</font> |
||
| + | |bgcolor="tomato"| OUT |
||
| + | |bgcolor="#CCCCCC" colspan=14| |
||
| + | |- |
||
| + | !4 |
||
| + | |bgcolor="green"|<font color="black">''Peter''</font> |
||
| + | |bgcolor="white"| SAFE |
||
| + | |bgcolor="white"| SAFE |
||
| + | |bgcolor="white"| SAFE |
||
| + | |bgcolor="cornflowerblue"| WIN |
||
| + | |bgcolor="cornflowerblue"| WIN |
||
| + | |bgcolor="white"| SAFE |
||
| + | |bgcolor="white"| SAFE |
||
| + | |bgcolor="pink"| NOM |
||
| + | |bgcolor="purple"| <font color="white">WIN</font> |
||
| + | |bgcolor="white"| SAFE |
||
| + | |bgcolor="tomato"| OUT |
||
| + | |bgcolor="#CCCCCC" colspan=14| |
||
| + | |- |
||
| + | !5 |
||
| + | |bgcolor="green"|<font color="black">''Kelly''</font> |
||
| + | |bgcolor="pink"| NOM |
||
| + | |bgcolor="white"| SAFE |
||
| + | |bgcolor="white"| SAFE |
||
| + | |bgcolor="cornflowerblue"| WIN |
||
| + | |bgcolor="cornflowerblue"| WIN |
||
| + | |bgcolor="pink"| NOM |
||
| + | |bgcolor="pink"| NOM |
||
| + | |bgcolor="white"| SAFE |
||
| + | |bgcolor="pink"| BTM2 |
||
| + | |bgcolor="tomato"| OUT |
||
| + | |bgcolor="#CCCCCC" colspan=14| |
||
| + | |- |
||
| + | !6 |
||
| + | |bgcolor="green"|<font color="black">''Adam''</font> |
||
| + | |bgcolor="cornflowerblue"| WIN |
||
| + | |bgcolor="cornflowerblue"| WIN |
||
| + | |bgcolor="cornflowerblue"| WIN |
||
| + | |bgcolor="white"| SAFE |
||
| + | |bgcolor="pink" | NOM |
||
| + | |bgcolor="cornflowerblue"| WIN |
||
| + | |bgcolor="cornflowerblue"| WIN |
||
| + | |bgcolor="cornflowerblue"| WIN |
||
| + | |bgcolor="purple" | <font color="white">WIN</font> |
||
| + | |bgcolor="tomato"| OUT |
||
| + | |bgcolor="#CCCCCC" colspan=14| |
||
| + | |- |
||
| + | !7 |
||
| + | |bgcolor="green"|<font color="black">''Blake''</font> |
||
| + | |bgcolor="cornflowerblue"| WIN |
||
| + | |bgcolor="cornflowerblue"| WIN |
||
| + | |bgcolor="cornflowerblue"| WIN |
||
| + | |bgcolor="white"| SAFE |
||
| + | |bgcolor="white"| SAFE |
||
| + | |bgcolor="cornflowerblue"| WIN |
||
| + | |bgcolor="cornflowerblue"| WIN |
||
| + | |bgcolor="cornflowerblue"| WIN |
||
| + | |bgcolor="tomato"| OUT |
||
| + | |bgcolor="#CCCCCC" colspan=14| |
||
| + | |- |
||
| + | !8 |
||
| + | |bgcolor="red"|<font color="black">''Denny''</font> |
||
| + | |bgcolor="white"| SAFE |
||
| + | |bgcolor="white"| SAFE |
||
| + | |bgcolor="white"| SAFE |
||
| + | |bgcolor="cornflowerblue"| WIN |
||
| + | |bgcolor="cornflowerblue"| WIN |
||
| + | |bgcolor="white"| SAFE |
||
| + | |bgcolor="white"| SAFE |
||
| + | |bgcolor="tomato"| OUT |
||
| + | |bgcolor="#CCCCCC" colspan=14| |
||
| + | |- |
||
| + | !9 |
||
| + | |bgcolor="blue"|<font color="black">''Tara''</font> |
||
| + | |bgcolor="cornflowerblue"| WIN |
||
| + | |bgcolor="cornflowerblue"| WIN |
||
| + | |bgcolor="cornflowerblue"| WIN |
||
| + | |bgcolor="white"| SAFE |
||
| + | |bgcolor="white"| SAFE |
||
| + | |bgcolor="cornflowerblue"| WIN |
||
| + | |bgcolor="cornflowerblue"| WIN |
||
| + | |bgcolor="orange"| LEFT |
||
| + | |bgcolor="#CCCCCC" colspan=14| |
||
| + | |- |
||
| + | !10 |
||
| + | |bgcolor="red"|<font color="black">''Brad''</font> |
||
| + | |bgcolor="white"| SAFE |
||
| + | |bgcolor="pink"| NOM |
||
| + | |bgcolor="pink"| NOM |
||
| + | |bgcolor="cornflowerblue"| WIN |
||
| + | |bgcolor="cornflowerblue"| WIN |
||
| + | |bgcolor="white" | SAFE |
||
| + | |bgcolor="tomato"| OUT |
||
| + | |bgcolor="#CCCCCC" colspan=14| |
||
| + | |- |
||
| + | !11 |
||
| + | |bgcolor="red"|<font color="black">''Andre''</font> |
||
| + | |bgcolor="white"| SAFE |
||
| + | |bgcolor="white"| SAFE |
||
| + | |bgcolor="white"| SAFE |
||
| + | |bgcolor="cornflowerblue"| WIN |
||
| + | |bgcolor="cornflowerblue"| WIN |
||
| + | |bgcolor="tomato" | OUT |
||
| + | |bgcolor="#CCCCCC" colspan=14| |
||
| + | |- |
||
| + | !12 |
||
| + | |bgcolor="blue"|<font color="black">''Caleb''</font> |
||
| + | |bgcolor="cornflowerblue"| WIN |
||
| + | |bgcolor="cornflowerblue"| WIN |
||
| + | |bgcolor="cornflowerblue"| WIN |
||
| + | |bgcolor="white" | SAFE |
||
| + | |bgcolor="tomato"| OUT |
||
| + | |bgcolor="#CCCCCC" colspan=14| |
||
| + | |- |
||
| + | !13 |
||
| + | |bgcolor="blue"|<font color="black">''Jim''</font> |
||
| + | |bgcolor="cornflowerblue"| WIN |
||
| + | |bgcolor="cornflowerblue"| WIN |
||
| + | |bgcolor="cornflowerblue"| WIN |
||
| + | |bgcolor="tomato"| OUT |
||
| + | |bgcolor="#CCCCCC" colspan=14| |
||
| + | |- |
||
| + | !14 |
||
| + | |bgcolor="red"|<font color="black">''Bill''</font> |
||
| + | |bgcolor="white"| SAFE |
||
| + | |bgcolor="white"| SAFE |
||
| + | |bgcolor="tomato"| OUT |
||
| + | |bgcolor="#CCCCCC" colspan=14| |
||
| + | |- |
||
| + | !15 |
||
| + | |bgcolor="red"|<font color="black">''Frank''</font> |
||
| + | |bgcolor="white"| SAFE |
||
| + | |bgcolor="tomato"| OUT |
||
| + | |bgcolor="#CCCCCC" colspan=14| |
||
| + | |- |
||
| + | !16 |
||
| + | |bgcolor="red"|<font color="black">''Mike''</font> |
||
| + | |bgcolor="tomato"| OUT |
||
| + | |bgcolor="#CCCCCC" colspan=14| |
||
| + | |} |
||
| + | |||
| + | :{{colorbox|cornflowerblue}} The player's team (episodes 1–8) won the challenge. |
||
| + | :{{colorbox|purple}} The player(s) won individually in the challenge. |
||
| + | :{{colorbox|white}} The player's team lost the challenge, but the player was not nominated for elimination (episodes 1–8); or the player did not finish a challenge at the top or bottom of the group (episodes 9–10). |
||
| + | :{{colorbox|pink}} The player was nominated for elimination, but won an elimination challenge (episodes 1–8); or the player finished a challenge at the bottom of the group, but won a tiebreaker (episodes 9–10). |
||
| + | :{{colorbox|tomato}} The player lost an elimination challenge and was eliminated. (In episodes 9 and 10, every challenge ended in one or more automatic eliminations.) |
||
| + | :{{colorbox|orange}} The player voluntarily withdrew from the competition. |
||
| + | :{{colorbox|yellow}} The player won a challenge to re-enter the competition. |
||
| + | :{{colorbox|limegreen}} The player won the $100,000 grand prize. |
||
[[Category:Season One| ]] |
[[Category:Season One| ]] |
||
[[Category:Seasons|1]] |
[[Category:Seasons|1]] |
||
Latest revision as of 16:09, 10 June 2020
| Season One | ||
|---|---|---|
|
| ||
| General information | ||
| Host | ||
| Country |
| |
| Language |
English | |
| Season information | ||
| Number of contestants |
16 | |
| Teams | ||
| Winner | ||
| Production and broadcasting | ||
| Production company | ||
| Channel | ||
| Number of episodes |
10 | |
| Run |
June 6–August 15, 2010 | |
| Status |
Concluded | |

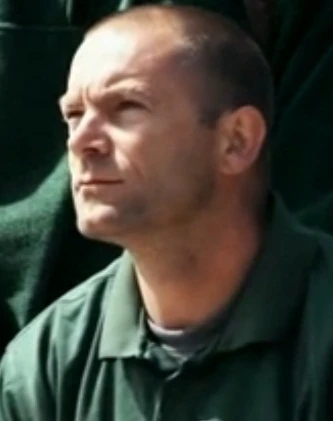
Season One of Top Shot premiered on June 6, 2010, and concluded on August 15, 2010. The season contained ten episodes, which aired on Sunday nights. The winner of the season was British marksman Iain Harrison, who was originally from the Blue Team.
Top Shot: The Complete Season One was released on DVD in the U.S. on January 11, 2011.
Production[]
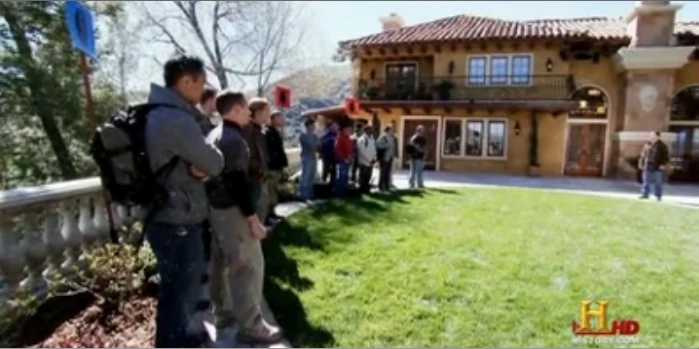
History Channel requested auditions for a reality show about competitive shooting. Potential contestants were required to fill an application form and send an audition video. After the audition process, 50 contestants were selected and auditioned personally. Finally, the sixteen contestants were selected.
The first season of Top Shot was filmed over the course of 33 days from March to April of 2010, in Santa Clarita, California. The season premiered on June 6, and concluded on August 15, 2010.
The entire season was released on DVD on January 11, 2011.
Rules[]
During their time living in the house, contestants were not allowed to have cell phones, e-mail, newspapers, books, TV or music. Also, they weren't allowed to leave the house grounds, except for the challenges.
Every third day, teams would have a practice to prepare them for a Team Challenge. The team that loses the Team Challenge has to go to the Nomination Range the next morning. There, the losing team has to nominate two contestants to face off in an Elimination Challenge. After a practice for that challenge, the nominated contestants compete. The loser of the Elimination Challenge must leave the competition.
Contestants[]
| Contestant | Original Team | Merged Team | Eliminated | |
|---|---|---|---|---|

|
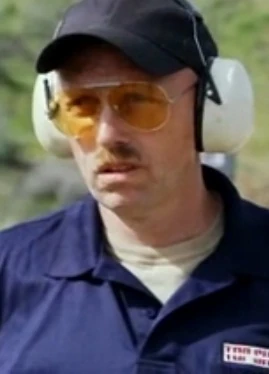
Mike Seeklander 38, Owasso, OK |
Red Team | 16th Place | |

|
Frank Campana 47, Yonkers, NY |
Red Team | 15th Place | |

|
Bill Carns 40, Pahrump, NV |
Red Team | 14th Place | |
|
James "Jim" Sinclair 48, Dover, NH |
Blue Team | 13th Place | |
|
Caleb Giddings 27, Fishers, IN |
Blue Team | 12th Place | |

|
Andre Robinson 28, Pittsburgh, PA |
Red Team | 11th Place | |

|
Brad Engmann 26, San Francisco, CA |
Red Team | 10th Place | |
|
Tara Poremba 36, Chicago, IL |
Blue Team | 9th Place | |

|
Denny Chapman 41, Ocala, FL |
Red Team | 8th Place | |

|
Blake Miguez 28, New Iberia, LA |
Blue Team | Green Team | 7th Place |

|
Adam Benson 44, Baltimore, MD |
Blue Team | 6th Place | |

|
Kelly Bachand 22, Kent, WA |
Red Team | 5th Place | |

|
Peter Palma 29, Norristown, PA |
Red Team | 4th Place | |
|
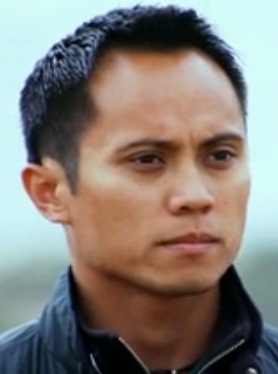
Simon "J.J." Racaza 29, New Milford, NJ |
Blue Team | 3rd Place | |

|
Chris Cerino 40, Wadsworth, OH |
Blue Team | 2nd place | |
|
Iain Harrison 42, Sherwood, OR |
Blue Team | Winner | |
Episodes[]


Elimination[]
| # | Contestants | Episodes | |||||||||||||||||||||||||
|---|---|---|---|---|---|---|---|---|---|---|---|---|---|---|---|---|---|---|---|---|---|---|---|---|---|---|---|
| 1 | 2 | 3 | 4 | 5 | 6 | 7 | 8 | 9 | 10 | ||||||||||||||||||
| 1 | Iain | WIN | WIN | WIN | NOM | SAFE | WIN | WIN | WIN | SAFE | SAFE | WIN | WIN | WINNER | |||||||||||||
| 2 | Chris | WIN | WIN | WIN | SAFE | SAFE | WIN | WIN | WIN | SAFE | SAFE | BTM2 | SAFE | OUT | |||||||||||||
| 3 | J.J. | WIN | WIN | WIN | SAFE | SAFE | WIN | WIN | WIN | SAFE | WIN | WIN | OUT | ||||||||||||||
| 4 | Peter | SAFE | SAFE | SAFE | WIN | WIN | SAFE | SAFE | NOM | WIN | SAFE | OUT | |||||||||||||||
| 5 | Kelly | NOM | SAFE | SAFE | WIN | WIN | NOM | NOM | SAFE | BTM2 | OUT | ||||||||||||||||
| 6 | Adam | WIN | WIN | WIN | SAFE | NOM | WIN | WIN | WIN | WIN | OUT | ||||||||||||||||
| 7 | Blake | WIN | WIN | WIN | SAFE | SAFE | WIN | WIN | WIN | OUT | |||||||||||||||||
| 8 | Denny | SAFE | SAFE | SAFE | WIN | WIN | SAFE | SAFE | OUT | ||||||||||||||||||
| 9 | Tara | WIN | WIN | WIN | SAFE | SAFE | WIN | WIN | LEFT | ||||||||||||||||||
| 10 | Brad | SAFE | NOM | NOM | WIN | WIN | SAFE | OUT | |||||||||||||||||||
| 11 | Andre | SAFE | SAFE | SAFE | WIN | WIN | OUT | ||||||||||||||||||||
| 12 | Caleb | WIN | WIN | WIN | SAFE | OUT | |||||||||||||||||||||
| 13 | Jim | WIN | WIN | WIN | OUT | ||||||||||||||||||||||
| 14 | Bill | SAFE | SAFE | OUT | |||||||||||||||||||||||
| 15 | Frank | SAFE | OUT | ||||||||||||||||||||||||
| 16 | Mike | OUT | |||||||||||||||||||||||||
- The player's team (episodes 1–8) won the challenge.
- The player(s) won individually in the challenge.
- The player's team lost the challenge, but the player was not nominated for elimination (episodes 1–8); or the player did not finish a challenge at the top or bottom of the group (episodes 9–10).
- The player was nominated for elimination, but won an elimination challenge (episodes 1–8); or the player finished a challenge at the bottom of the group, but won a tiebreaker (episodes 9–10).
- The player lost an elimination challenge and was eliminated. (In episodes 9 and 10, every challenge ended in one or more automatic eliminations.)
- The player voluntarily withdrew from the competition.
- The player won a challenge to re-enter the competition.
- The player won the $100,000 grand prize.