No edit summary |
|||
| Line 66: | Line 66: | ||
| [[The Gauntlet]] |
| [[The Gauntlet]] |
||
| [[Smith & Wesson 500 Magnum]] ([[Preliminary Challenge|preliminary]])<br />[[LaRue Tactical OBR]] ([[Team Challenge|team]])<br />[[Winchester Model 1873]] ([[Elimination Challenge|elimination]]) |
| [[Smith & Wesson 500 Magnum]] ([[Preliminary Challenge|preliminary]])<br />[[LaRue Tactical OBR]] ([[Team Challenge|team]])<br />[[Winchester Model 1873]] ([[Elimination Challenge|elimination]]) |
||
| − | | [[Jim Finch]] |
+ | | <small>[[Jim Finch]]</small> |
| − | | bgcolor="red" | [[Amanda Hardin|<font color="white">Amanda Hardin</font>]] |
+ | | bgcolor="red" | <small>[[Amanda Hardin|<font color="white">Amanda Hardin</font>]]</small> |
|- |
|- |
||
| [[File:Down and Dirty.jpg|110px]] |
| [[File:Down and Dirty.jpg|110px]] |
||
| Line 73: | Line 73: | ||
| [[Down and Dirty]] |
| [[Down and Dirty]] |
||
| [[AK-47]] (team)<br />[[Smith & Wesson M&P .45]] (elimination) |
| [[AK-47]] (team)<br />[[Smith & Wesson M&P .45]] (elimination) |
||
| − | | [[Craig Sawyer]] |
+ | | <small>[[Craig Sawyer]]</small> |
| − | | bgcolor="blue" | [[Sara Ahrens|<font color="white">Sara Ahrens</font>]] |
+ | | bgcolor="blue" | <small>[[Sara Ahrens|<font color="white">Sara Ahrens</font>]]</small> |
|- |
|- |
||
| [[File:Slug it Out.jpg|110px]] |
| [[File:Slug it Out.jpg|110px]] |
||
| Line 80: | Line 80: | ||
| [[Slug it Out]] |
| [[Slug it Out]] |
||
| [[Benelli M4 Super 90]] (team)<br />[[Glock 34]] (elimination) |
| [[Benelli M4 Super 90]] (team)<br />[[Glock 34]] (elimination) |
||
| − | | [[Taran Butler]] |
+ | | <small>[[Taran Butler]]</small> |
| − | | bgcolor="red" | [[Drew Shprintz|<font color="white">Drew Shprintz</font>]] |
+ | | bgcolor="red" | <small>[[Drew Shprintz|<font color="white">Drew Shprintz</font>]]</small> |
|- |
|- |
||
| [[File:Bulldog gatling gun.jpg|110px]] |
| [[File:Bulldog gatling gun.jpg|110px]] |
||
| Line 87: | Line 87: | ||
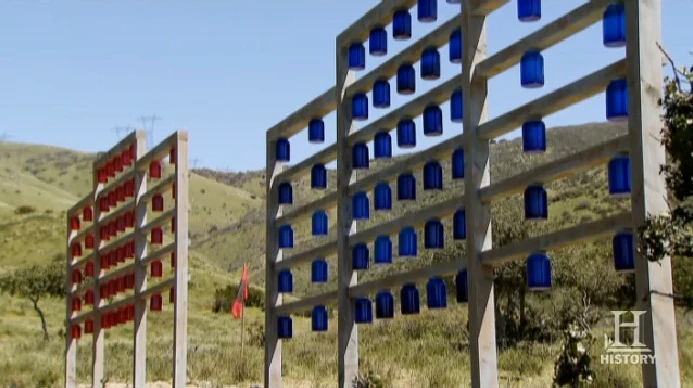
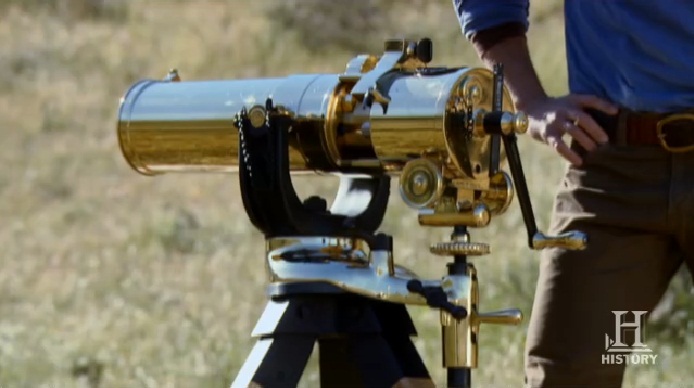
| [[The Bulldog Gatling]] |
| [[The Bulldog Gatling]] |
||
| [[Remington 1875]] (team)<br />[[1877 Bulldog gatling gun]] (elimination) |
| [[Remington 1875]] (team)<br />[[1877 Bulldog gatling gun]] (elimination) |
||
| − | | [[Spencer Hoglund]] (team)<br />[[Garry James]] (elimination) |
+ | | <small>[[Spencer Hoglund]] (team)<br />[[Garry James]] (elimination) |
| − | | bgcolor="red" | [[Mark Schneider|<font color="white">Mark Schneider</font>]] |
+ | | bgcolor="red" | <small>[[Mark Schneider|<font color="white">Mark Schneider</font>]]</small> |
|- |
|- |
||
|[[File:Throwdown Showdown.jpg|110px]] |
|[[File:Throwdown Showdown.jpg|110px]] |
||
| Line 94: | Line 94: | ||
| [[Throwdown Showdown]] |
| [[Throwdown Showdown]] |
||
| [[Hotchkiss mountain gun]] (elimination)<br />[[Rock]] (team)<br />[[Throwing knife]] (team)<br />[[Tomahawk]] (team) |
| [[Hotchkiss mountain gun]] (elimination)<br />[[Rock]] (team)<br />[[Throwing knife]] (team)<br />[[Tomahawk]] (team) |
||
| − | | [[Jack Dagger]] |
+ | | <small>[[Jack Dagger]]<br />[[Rick Pohlers]]</small> |
| − | | bgcolor="blue" | [[Jarrett Grimes|<font color="white">Jarrett Grimes</font>]] |
+ | | bgcolor="blue" | <small>[[Jarrett Grimes|<font color="white">Jarrett Grimes</font>]]</small> |
|- |
|- |
||
|[[File:Turn the Corner.jpg|110px]] |
|[[File:Turn the Corner.jpg|110px]] |
||
| Line 101: | Line 101: | ||
| [[Turn the Corner]] |
| [[Turn the Corner]] |
||
| [[Vltor TS3]] (team)<br />[[CornerShot]] (elimination) |
| [[Vltor TS3]] (team)<br />[[CornerShot]] (elimination) |
||
| − | | [[Jeff Gonzales]] |
+ | | <small>[[Jeff Gonzales]]</small> |
| − | | bgcolor="blue" | [[Paul Marinaccio|<font color="white">Paul Marinaccio</font>]] |
+ | | bgcolor="blue" | <small>[[Paul Marinaccio|<font color="white">Paul Marinaccio</font>]]</small> |
|- |
|- |
||
| rowspan="2" |[[File:Tricked Out.jpg|110px]] |
| rowspan="2" |[[File:Tricked Out.jpg|110px]] |
||
| Line 108: | Line 108: | ||
| rowspan="2" | [[Tricked Out]] |
| rowspan="2" | [[Tricked Out]] |
||
| rowspan="2" | [[Schofield 5-Inch Barrel Pinkerton Model]] (elimination)<br />[[Smith & Wesson 686]] (team)<br />[[Volquartsen .22 Semi-Auto rifle]] (team) |
| rowspan="2" | [[Schofield 5-Inch Barrel Pinkerton Model]] (elimination)<br />[[Smith & Wesson 686]] (team)<br />[[Volquartsen .22 Semi-Auto rifle]] (team) |
||
| − | | rowspan="2" | [[Jerry Miculek]] |
+ | | rowspan="2" | <small>[[Jerry Miculek]]</small> |
| − | | bgcolor="blue" | [[Billy Rogers|<font color="white">Billy Rogers</font>]] |
+ | | bgcolor="blue" | <small>[[Billy Rogers|<font color="white">Billy Rogers</font>]]</small> |
|- |
|- |
||
| − | | bgcolor="red" | [[Michael Marelli|<font color="white">Michael Marelli</font>]] |
+ | | bgcolor="red" | <small>[[Michael Marelli|<font color="white">Michael Marelli</font>]]</small> |
|- |
|- |
||
|[[File:Ramp it Up.jpg|110px]] |
|[[File:Ramp it Up.jpg|110px]] |
||
| Line 117: | Line 117: | ||
| [[Ramp It Up]] |
| [[Ramp It Up]] |
||
|[[Recurve bow]] |
|[[Recurve bow]] |
||
| − | | [[Chris Palmer]] |
+ | | <small>[[Chris Palmer]]</small> |
| − | |bgcolor=red|[[Cliff Walsh|<font color="white">Cliff Walsh</font>]] |
+ | |bgcolor=red|<small>[[Cliff Walsh|<font color="white">Cliff Walsh</font>]]</small>v |
|- |
|- |
||
|[[File:Stacked.jpg|110px]] |
|[[File:Stacked.jpg|110px]] |
||
| Line 124: | Line 124: | ||
| [[Stacked]] |
| [[Stacked]] |
||
|[[McMillan Tac-50 rifle]] (individual)<br />[[Walther P38]] (elimination) |
|[[McMillan Tac-50 rifle]] (individual)<br />[[Walther P38]] (elimination) |
||
| − | | [[Craig Sawyer]] |
+ | | <small>[[Craig Sawyer]] |
| − | | bgcolor=green| [[Mike Hughes|<font color="white">Mike Hughes</font>]] |
+ | | bgcolor=green| <small>[[Mike Hughes|<font color="white">Mike Hughes</font>]] |
|- |
|- |
||
| rowspan="2" | [[File:Odd Man Out.jpg|110px]] |
| rowspan="2" | [[File:Odd Man Out.jpg|110px]] |
||
| Line 131: | Line 131: | ||
| rowspan="2" | [[Odd Man Out]] |
| rowspan="2" | [[Odd Man Out]] |
||
| rowspan="2" | [[Infinity Sight Tracker .40 pistol]] (individual)<br />[[Sako TRG rifle]] (elimination) |
| rowspan="2" | [[Infinity Sight Tracker .40 pistol]] (individual)<br />[[Sako TRG rifle]] (elimination) |
||
| − | | rowspan="2" | [[Taran Butler]] |
+ | | rowspan="2" | <small>[[Taran Butler]]<br />[[Mike Voigt]]</small> |
| − | | bgcolor=green | [[Jake Zweig|<font color="white">Jake Zweig</font>]] |
+ | | bgcolor=green | <small>[[Jake Zweig|<font color="white">Jake Zweig</font>]]</small> |
|- |
|- |
||
| − | | bgcolor=green | [[Phil Morden|<font color="white">Phil Morden</font>]] |
+ | | bgcolor=green | <small>[[Phil Morden|<font color="white">Phil Morden</font>]]</small> |
|- |
|- |
||
|[[File:Wheel of Fire.jpg|110px]] |
|[[File:Wheel of Fire.jpg|110px]] |
||
| Line 140: | Line 140: | ||
| [[Wheel of Fire]] |
| [[Wheel of Fire]] |
||
|[[SP89]] (individual)<br/>[[Steyr SPP]] (elimination) |
|[[SP89]] (individual)<br/>[[Steyr SPP]] (elimination) |
||
| − | | [[Matt Burkett]] |
+ | | <small>[[Matt Burkett]] |
| − | | bgcolor=green| [[Alex Charvat|<font color="white">Alex Charvat</font>]] |
+ | | bgcolor=green| <small>[[Alex Charvat|<font color="white">Alex Charvat</font>]] |
|- |
|- |
||
| rowspan="5" | [[File:S3 Finale.jpg|110px]] |
| rowspan="5" | [[File:S3 Finale.jpg|110px]] |
||
| Line 148: | Line 148: | ||
| rowspan="5" | [[AK-47]]<br/>[[Benelli M4 Super 90]]<br/>[[Glock 34]]<br/>[[Infinity Sight Tracker .40 pistol]]<br/>[[LaRue Tactical OBR]]<br/>[[Recurve bow]]<br/>[[Remington 1875]]<br/>[[Rock]]s<br/>[[Smith & Wesson 500 Magnum]]<br/>[[Smith & Wesson 686]]<br/>[[SP89]]<br/>[[Vltor TS3]]<br/>[[Volquartsen .22 Semi-Auto rifle]]<br/>[[Winchester Model 1873]] |
| rowspan="5" | [[AK-47]]<br/>[[Benelli M4 Super 90]]<br/>[[Glock 34]]<br/>[[Infinity Sight Tracker .40 pistol]]<br/>[[LaRue Tactical OBR]]<br/>[[Recurve bow]]<br/>[[Remington 1875]]<br/>[[Rock]]s<br/>[[Smith & Wesson 500 Magnum]]<br/>[[Smith & Wesson 686]]<br/>[[SP89]]<br/>[[Vltor TS3]]<br/>[[Volquartsen .22 Semi-Auto rifle]]<br/>[[Winchester Model 1873]] |
||
| rowspan="5" | none |
| rowspan="5" | none |
||
| − | | bgcolor=green| [[Chris Collins|<font color="white">Chris Collins</font>]] |
+ | | bgcolor=green| <small>[[Chris Collins|<font color="white">Chris Collins</font>]]</small> |
|- |
|- |
||
| − | | bgcolor=green| [[Gary Quesenberry|<font color="white">Gary Quesenberry</font>]] |
+ | | bgcolor=green| <small>[[Gary Quesenberry|<font color="white">Gary Quesenberry</font>]]</small> |
|- |
|- |
||
| − | | bgcolor=green| [[Mike Hughes|<font color="white">Mike Hughes</font>]] |
+ | | bgcolor=green| <small>[[Mike Hughes|<font color="white">Mike Hughes</font>]]</small> |
|- |
|- |
||
| <center>'''Winner'''</center> |
| <center>'''Winner'''</center> |
||
|- |
|- |
||
| − | | bgcolor=green| [[Dustin Ellermann|<font color="white">Dustin Ellermann</font>]] |
+ | | bgcolor=green| <small>[[Dustin Ellermann|<font color="white">Dustin Ellermann</font>]]</small> |
|} |
|} |
||
Revision as of 06:19, 18 March 2012
| Season Three | ||
|---|---|---|
|
| ||
| General information | ||
| Host | ||
| Country | ||
| Language | ||
| Season information | ||
| Number of contestants |
16 | |
| Teams | ||
| Winner | ||
| Production and broadcasting | ||
| Production company | ||
| Channel | ||
| Run |
August 9, 2011–October 25, 2011 | |
| Status |
Concluded | |

- "The challenges are not only going to be rigorous, they'll be downright torturous. In Season Three, the gloves are coming off."
- ―Colby Donaldson[src]
Season Three of Top Shot premiered on August 9, 2011 and concluded on October 25, 2011. The season contained 13 episodes and was filmed during 2011 in Santa Clarita, California.
Production
History Channel requested auditions for a third season. Potential contestants were required to fill an application form and send an audition video. After the audition process, 50 contestants were selected and auditioned personally. Finally, the sixteen contestants were selected.
The third season of Top Shot was filmed over the course of 35 days, in Santa Clarita, California. The season premiered on August 9, and concluded on October 25, 2011.
Rules
The rules of Season Three were similar to those of the previous seasons, retaining the same rules for the Team Challenges, Practice Sessions, Individual Challenges, and Elimination Challenges. However, in the beginning, a Preliminary Challenge took place; those who became victorious joined the Blue Team, while the unvictorious joined the Red Team. During the individual portion of the competition, instead of being given the chance to vote for anybody not immune, such as in Season Two, the three worst performers of each challenge were eligible to be nominated for elimination.
This is the first season in which an individual of the Green Team withdrew themselves from the competition, and according to rules, the individual eliminated before him took his place in the Elimination Challenge that he would have competed in, for a chance of reentering the competition.
Contestants

The sixteen people chosen for Season Three.
- "Every single marksman that shows up on Season Three has something to prove."
- ―Colby Donaldson[src]
For Season Three, just like Season One and Season Two, sixteen contestants were chosen for the show after the producers viewed their audition videos and read their application forms. However, for the first time, the contestants were announced to the public before the first episode of the season was aired, with a slight introduction of each in Season Two's "Behind the Bullet". The contestants chosen to compete were:
| Contestant | Age | Occupation / Background | Hometown | Original Team | Merged Team | Eliminated |
|---|---|---|---|---|---|---|
| Amanda Hardin | 33 | Firearms Instructor, Nurse, Real Estate Agent | Birmingham, AL | Red Team | 16th | |
| Sara Ahrens | 38 | Police Training Sergeant | Roscoe, IL | Blue Team | 15th | |
| Drew Shprintz | 27 | Firearms Instructor/Bartender | Boca Raton, FL | Red Team | 14th | |
| Mark Schneider | 45 | USPSA Competitor, Outdoorsman, Customer Service Professional | Tierra Verde, Fl | Red Team | 13th | |
| Jarrett Grimes | 42 | Homeland Security Agent | Atlanta, GA | Blue Team | 12th | |
| Paul Marinaccio | 31 | Detective/Firearms Instructor | Fairfield, NJ | Blue Team | 11th | |
| Billy Rogers | 33 | Restaurant Operations Manager | Calabasas, CA | Blue Team | 10th | |
| Michael Marelli | 28 | NY State Court Officer | Long Island, NY | Red Team | 9th | |
| Cliff Walsh | 40 | Revolver Champion/Airport Driver | St. Petersburg, FL | Red Team | 8th | |
| Jake Zweig | 39 | Ex Navy SEAL/College Football Coach | Barrington, NH | Blue Team | Green Team | 7th |
| Phil Morden | 25 | Three Gun Competitor, Video Producer | Milford, MI | Red Team | Green Team | 6th |
| Alex Charvat | 38 | Engineer/Outdoorsman | Conifer, CO | Blue Team | Green Team | 5th |
| Chris Collins | 26 | Firearms Instructor, Former Marine, Student | Collinsville, OK | Red Team | Green Team | 4th |
| Gary Quesenberry | 40 | Homeland Security Agent | Cleveland, OH | Red Team | Green Team | 3rd |
| Mike Hughes | 38 | Competitive Pistol Shooter | Maple Falls, WA | Blue Team | Green Team | 2nd |
| Dustin Ellermann | 28 | Christian Camp Director | Zavala, TX | Blue Team | Green Team | 1st |
Episodes


Elimination
| # | Contestants | Episodes | ||||||||||||||||||||||||||
|---|---|---|---|---|---|---|---|---|---|---|---|---|---|---|---|---|---|---|---|---|---|---|---|---|---|---|---|---|
| 1 | 2 | 3 | 4 | 5 | 6 | 7 | 8 | 9 | 10 | 11 | 12 | |||||||||||||||||
| 1 | Dustin | WIN | NOM | WIN | WIN | SAFE | SAFE | WIN | WIN | WIN | WIN | WIN | BTM2 | WIN | WINNER | |||||||||||||
| 2 | Mike | WIN | SAFE | WIN | WIN | NOM | SAFE | WIN | WIN | OUT | IN | NOM | WIN | WIN | OUT | |||||||||||||
| 3 | Gary | SAFE | WIN | SAFE | SAFE | WIN | WIN | SAFE | SAFE | NOM | SAFE | SAFE | WIN | OUT | ||||||||||||||
| 4 | Chris | SAFE | WIN | SAFE | SAFE | WIN | WIN | SAFE | NOM | SAFE | WIN | WIN | OUT | |||||||||||||||
| 5 | Alex | WIN | SAFE | WIN | WIN | SAFE | SAFE | WIN | WIN | WIN | WIN | OUT | ||||||||||||||||
| 6 | Phil | SAFE | WIN | SAFE | SAFE | WIN | WIN | SAFE | SAFE | WIN | OUT | |||||||||||||||||
| 7 | Jake | WIN | SAFE | WIN | WIN | SAFE | NOM | WIN | WIN | WIN | LEFT | |||||||||||||||||
| 8 | Cliff | SAFE | WIN | NOM | SAFE | WIN | WIN | NOM | OUT | |||||||||||||||||||
| 9 | Michael | SAFE | WIN | SAFE | NOM | WIN | WIN | OUT | ||||||||||||||||||||
| 10 | Billy | WIN | SAFE | WIN | WIN | SAFE | SAFE | LEFT | ||||||||||||||||||||
| 11 | Paul | WIN | SAFE | WIN | WIN | SAFE | OUT | |||||||||||||||||||||
| 12 | Jarrett | WIN | SAFE | WIN | WIN | OUT | ||||||||||||||||||||||
| 13 | Mark | NOM | WIN | SAFE | OUT | |||||||||||||||||||||||
| 14 | Drew | SAFE | WIN | OUT | ||||||||||||||||||||||||
| 15 | Sara | WIN | OUT | |||||||||||||||||||||||||
| 16 | Amanda | OUT | ||||||||||||||||||||||||||
- The player's team (episodes 1–8) won the challenge.
- The player(s) won individually in the challenge.
- The player's team lost the challenge, but the player was not nominated for elimination (episodes 1–8); or the player did not finish a challenge at the top or bottom of the group (episodes 9–10).
- The player was nominated for elimination, but won an elimination challenge (episodes 1–8); or the player finished a challenge at the bottom of the group, but won a tiebreaker (episodes 9–10).
- The player lost an elimination challenge and was eliminated. (In episodes 9 and 10, every challenge ended in one or more automatic eliminations.)
- The player voluntarily withdrew from the competition.
- The player won a challenge to re-enter the competition.
- The player won the $100,000 grand prize.
Broadcasting
On July 11, 2011, the first commercial for Season Three was aired. At 10/9c on August 9, 2011, the season premiere, titled "The Gauntlet", was broadcasted. It was aired on the History Channel until its conclusion on October 25, 2011. The third season was filmed over a period of 35 days in Santa Clarita, California.